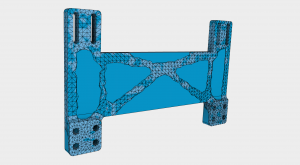
Inventor 2017: Shape Generator Tutorial

Funny thing about engineering,…it’s oftentimes easier to overengineer a part than it is to get it just right. The reason is simple: it just takes time to iterate on the design using information gained from simulations you’ve performed or prototypes you’ve tested to make incremental improvements.
Lightweighting is a perfect example. Figuring out where and how much material can be removed from the part requires at least a few trial and error iterations until you’ve removed as much mass as possible. In the long run it’s worth it – removing material can result in raw material cost savings, improve the performance of the overall product, and reduce the amount of energy required to move that component. But getting there should be easier.
When we introduced Shape Generator in the 2016 R2 release of Autodesk Inventor last year, that is exactly what we set out to do. Shape Generator takes basic geometry and uses the constraints and loads that it will experience in use to create an optimized version of the part that meets your lightweighting target. And it’s integrated right into the design process.
Take a look at the tutorial above to see it in action. If you’re an Inventor subscriber you can get started using it right now by downloading Inventor 2017 from your Autodesk accounts page. If you’re not, download the Inventor free trial and give it a whirl.
The post Inventor 2017: Shape Generator Tutorial appeared first on Inventor Official Blog.


